Note!
There are steps in the Metcash Integration configuration where an Initial Host File will need to be downloaded from Metcash.
Once the Initial Host File has been downloaded from Metcash, each Department in Idealpos will need to be linked to a Metcash Department, Metcash Category, Metcash Commodity and Metcash Sub-Commodity.
When the Metcash Integration is enabled, any Departments that are created or modified must have the Metcash Department, Category, Commodity and Sub-Commodities populated for the Department being created or modifed.
If the Metcash mapping fields are not populated when creating or modifying a Department, Idealpos will block that Department from being created/modified and the Department will only be saved once those Metcash mapping details have been populated.
Details about this process are outlined in the steps on this page further below.
Note!
The process outlined below should be completed on a Back Office Terminal that has a widescreen resolution of at least 1920x1080.
A widescreen resolution is strongly recommended as the Metcash Product Linking process involves linking and reviewing the linkage between Idealpos Stock Items and Metcash Products which are displayed next to each other in a grid format.
This process therefore requires a widescreen monitor resolution to view the Stock Item/Product data onscreen.
Completing this process on a lower resolution monitor will result in the inability to link Idealpos Stock Items to Metcash Products.
Before configuring the Metcash Integration, ensure that Metcash has supplied you with the required information and credentials to configure this integration.
The following is a list of the required information that should have been supplied by Metcash - if unsure, contact Metcash and request the required information before configuring this integration:
The following details are required for configuring Global Options > Interfaces > Metcash
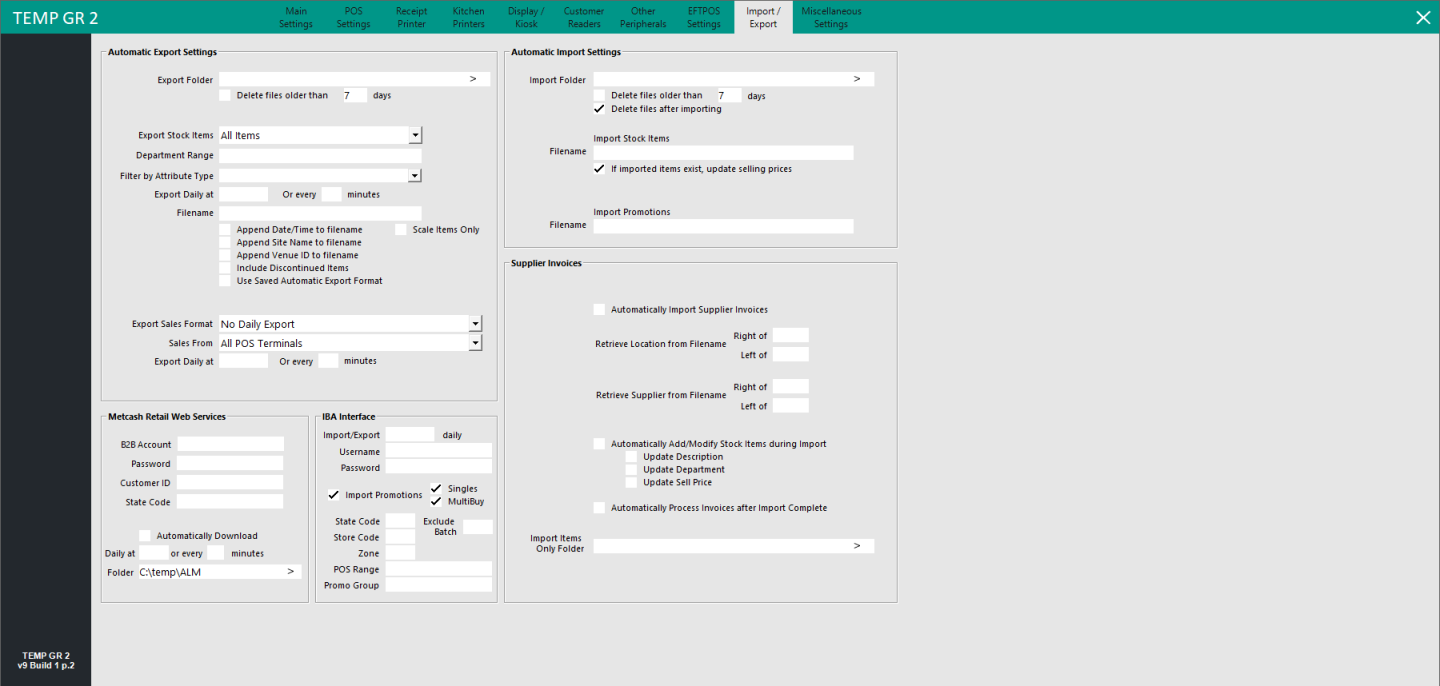
The following details are required for configuring POS Terminal > Import/Export > Metcash Retail Web Services
The following details are required for configuring POS Terminal > Import/Export > IBA Interface (if site is a Liquor Retailer)
The steps required to configure and enable the Metcash Integration are outlined as follows:
Contact Idealpos or your Idealpos Reseller to have the Metcash Basic or Metcash Advanced option enabled in your Licence.
The Metcash Basic option does not include the Loyalty Functionality, whereas the Metcash Advanced option will include Loyalty.
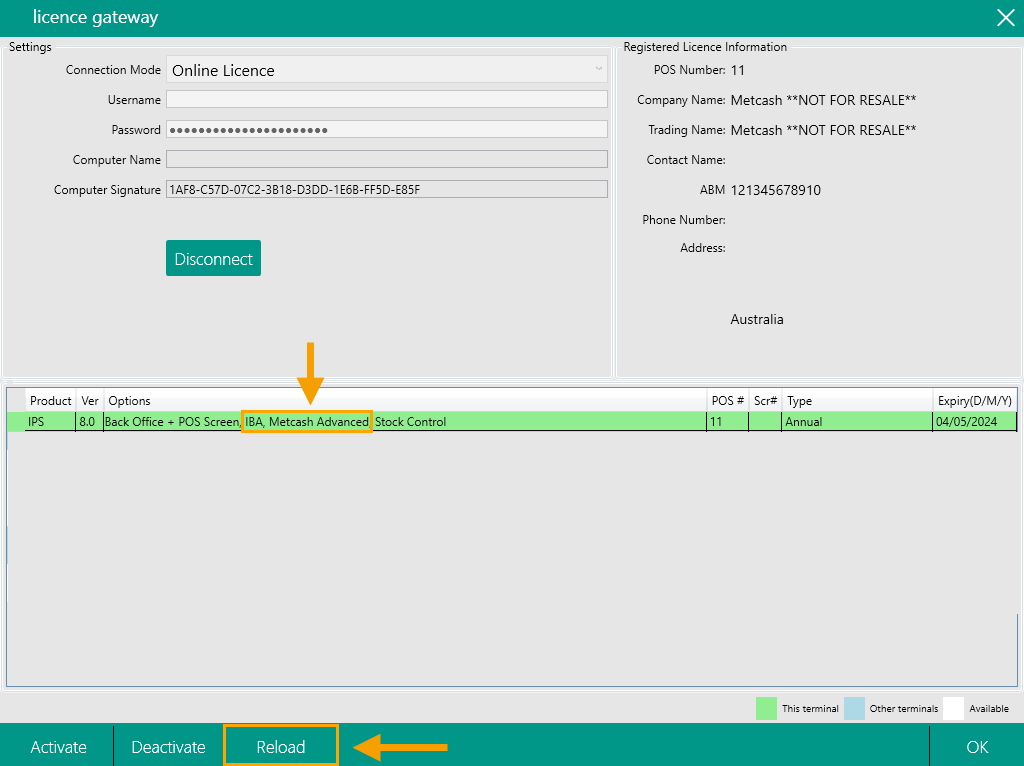
Once the Metcash option has been enabled, go to Back Office > Setup > Licence Gateway > Press Reload and ensure that either Metcash Basic or Metcash Advanced appear.
Note - If the venue is a liquor retailer, the IBA Interface (Independent Brands Australia) may also need to be enabled in the Licence Gateway.
After the Licence Gateway has been reloaded and the Metcash Basic/Advanced (and if the venue is a liquor retailer and requires the IBA module, the IBA module should also be enabled) option appears, it is recommended that you restart Idealpos to ensure that the modules are enabled.
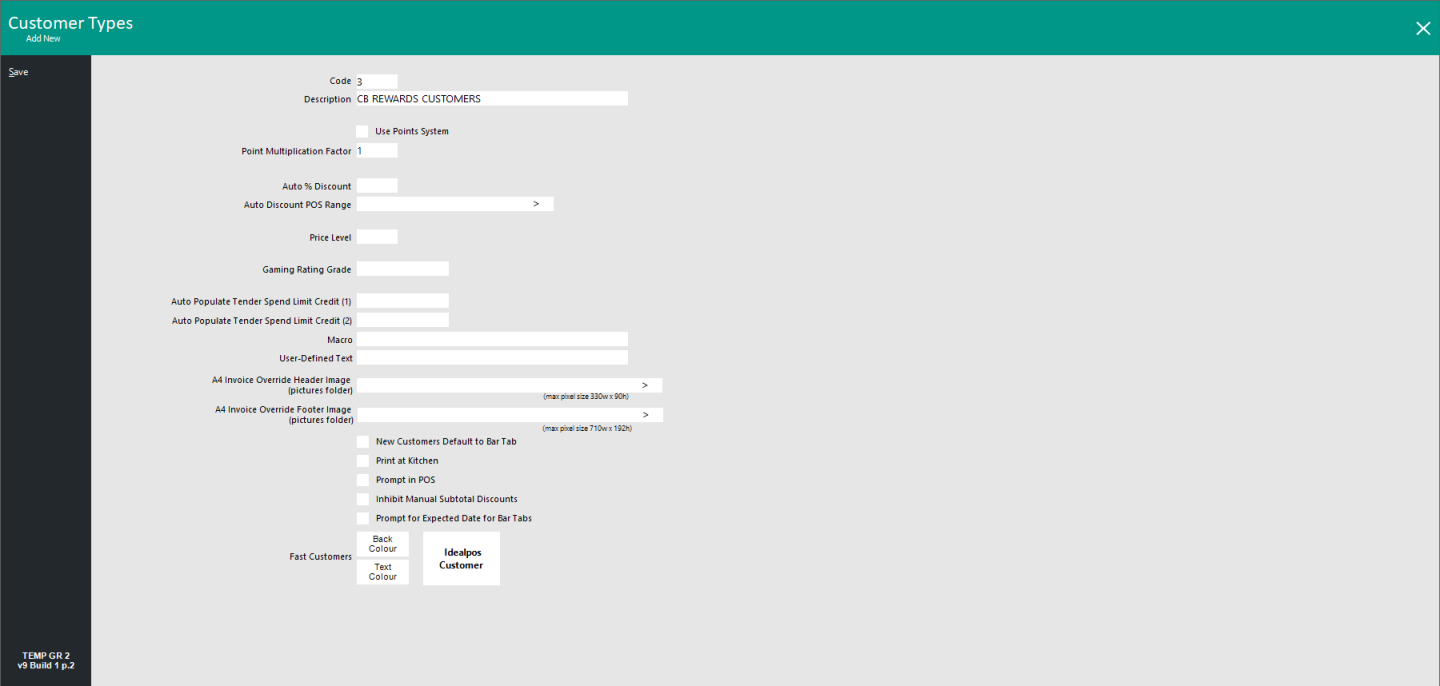
If required, a new Customer Type can be created - a Customer Type will need to be selected as part of the Metcash Interface Configuration further below.
Go to: Back Office > File > Customers > Customer Types > Add.
Enter the Customer Type Description and any other required details for the Customer Type that will be used for the Loyalty Program > Press Save.
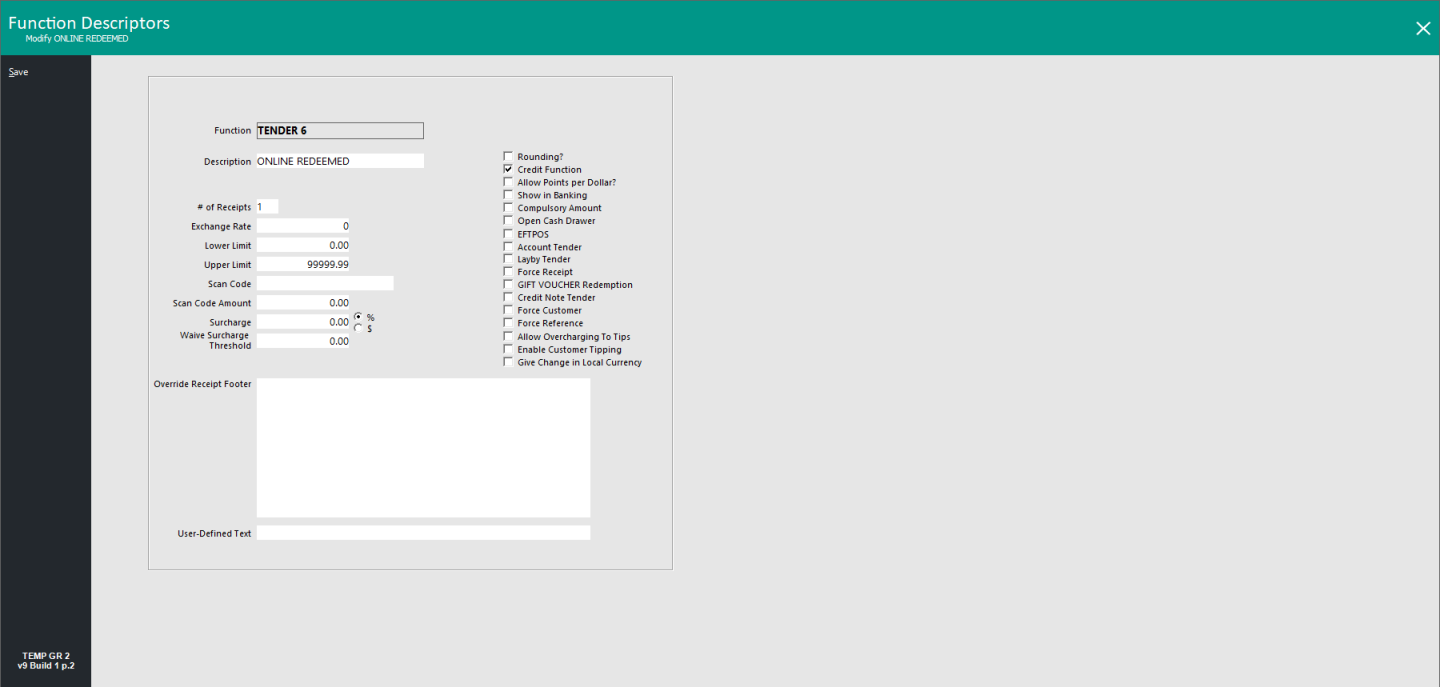
Go to: Back Office > Setup > Function Descriptors.
Locate the next available unused Tender Type > Select the Tender > Modify.
Unused Tenders in Idealpos are typically labelled as "TENDER #", where # is the number of the Tender that matches the Function Tender Number.
E.g. An example of an unused Tender will appear as "TENDER 8" if TENDER 8 is not configured.
Update the Description for the Tender and set any other options as required > Press "Save" on the top-left corner to save the changes.
Enable the Tender Type on the Tender Screen
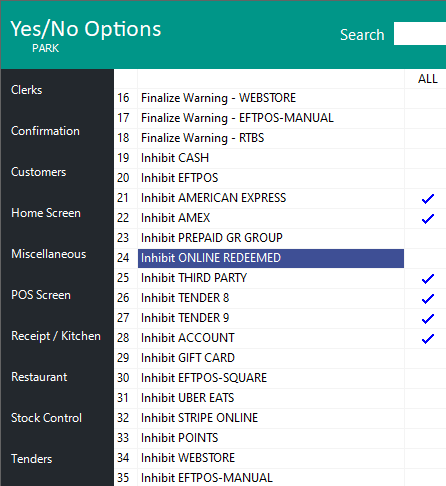
So that the Tender can be used on the Tender screen, it will need to be enabled.
Go to: Back Office > Setup > Yes/No Options > Tenders.
Ensure that the "Inhibit [TENDER DESCRIPTION]" option is unchecked for the Tender Description that matches the Tender created in the previous step.
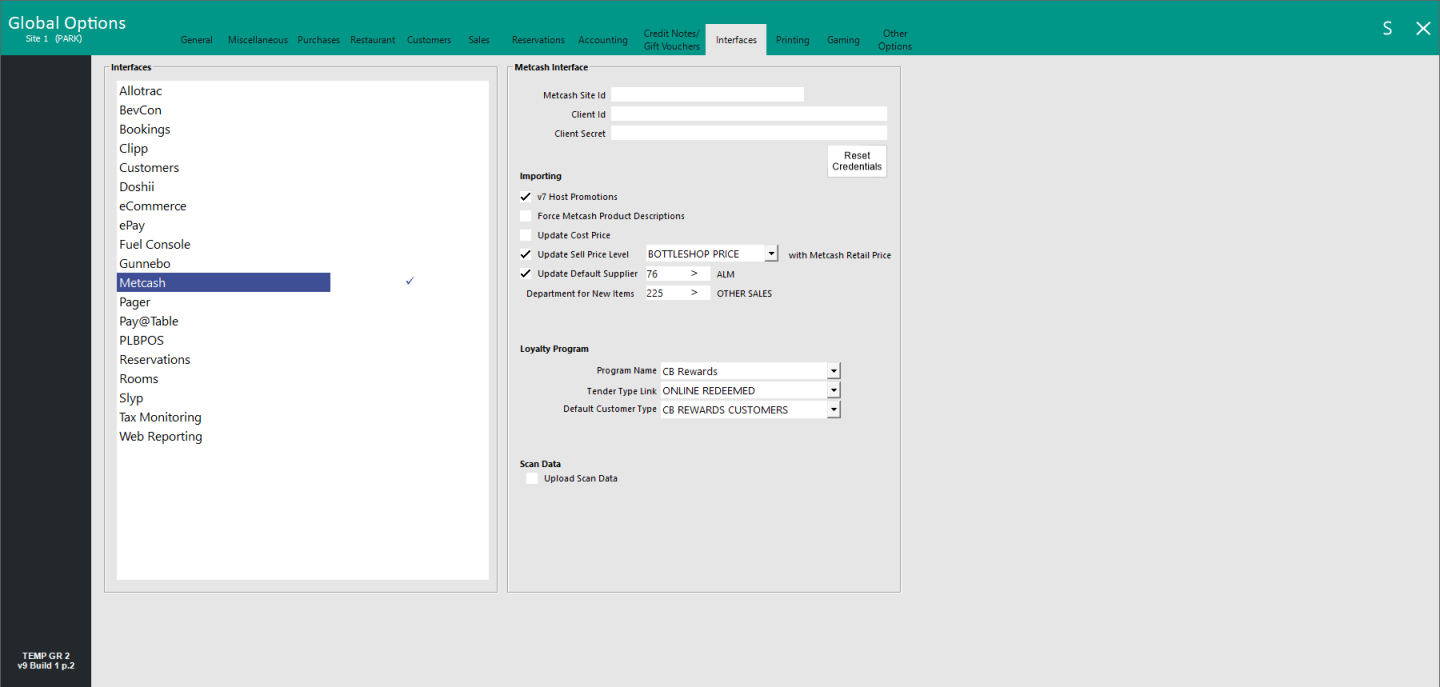
The Metcash Site ID, Client ID and Client Secret along with any other required options will need to be configured.
Go to: Back Office > Setup > Global Options > Interfaces > Select "Metcash" on the left-hand side.
Importing
Loyalty Program
Scan Data
Go to: Back Office > Setup > POS Terminals > Select POS Terminal > Modify > Import/Export.
In the Metcash Retail Web Services and IBA Interface sections, configure the settings as required.
Metcash Retail Web Services
IBA Interface
Once all the configuration steps have been completed as outlined above, the Initial Host File can be downloaded from Metcash.
It is strongly recommended that the Initial Host File is downloaded and processed outside of trade.
This is due to a large number of changes and activity taking place as part of the Initial Host File process which will generate large numbers of packets that will be sent to all networked POS Terminals/Back Offices.
Performing this during trade will result in degraded performance on your networked POS Terminals, and hence why we recommend performing this process outside of trading hours.
Go to: Back Office > Utilities > Metcash > Import Files
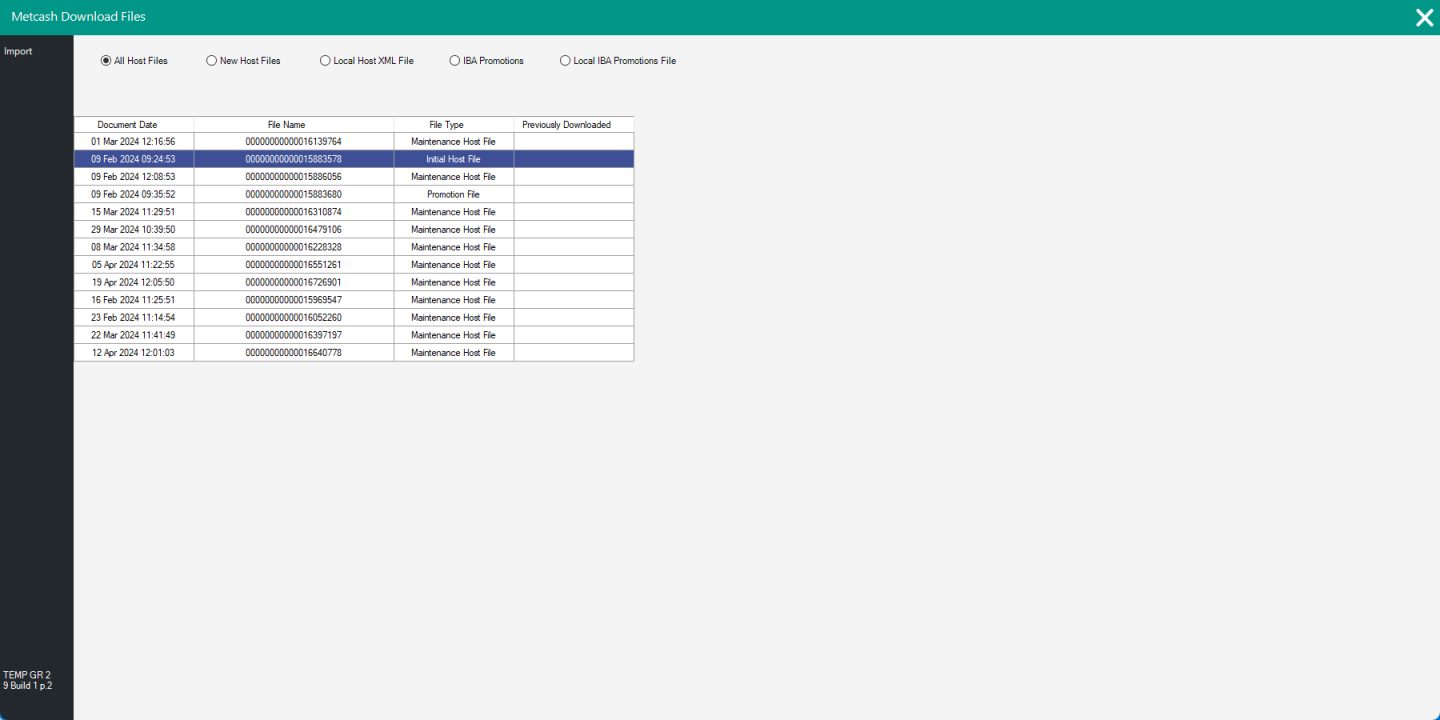
The Metcash Download Files window will be displayed.
The default option selected will be "New Host Files", however, the following options are available and can be used to Download/Import Host Files from various sources/locations.
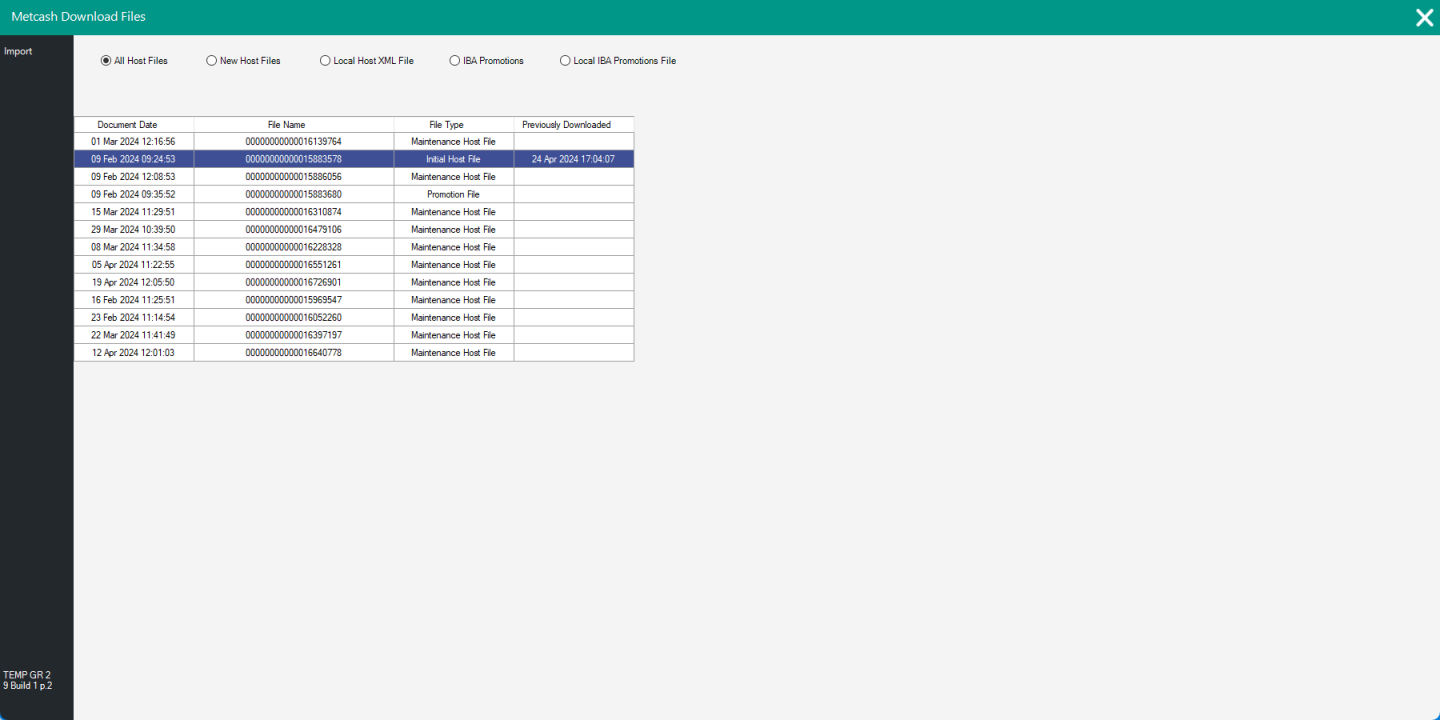
The following screenshot shows an example of All Host Files that are available in a test environment.
After an Initial Host File has been selected from the list of Host Files, select the "Import" button on the top-left corner to commence the download of the Host File.
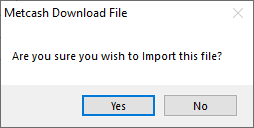
A Confirmation Prompt will be displayed - press "Yes" to continue with the Download and Import of the file.
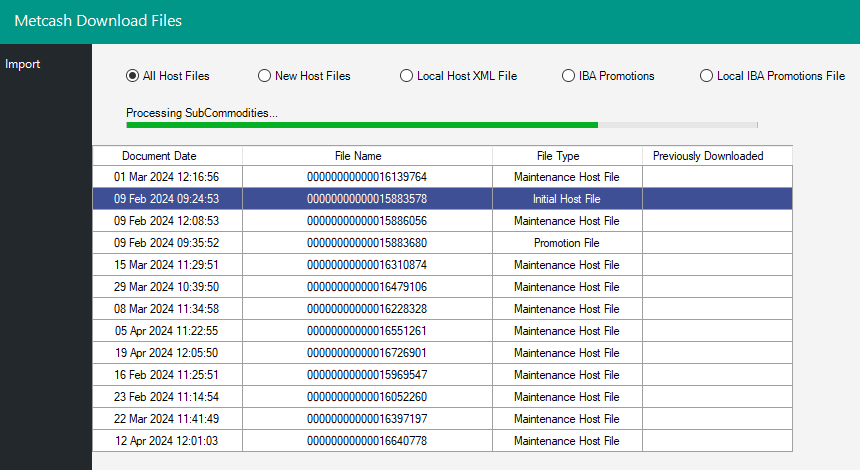
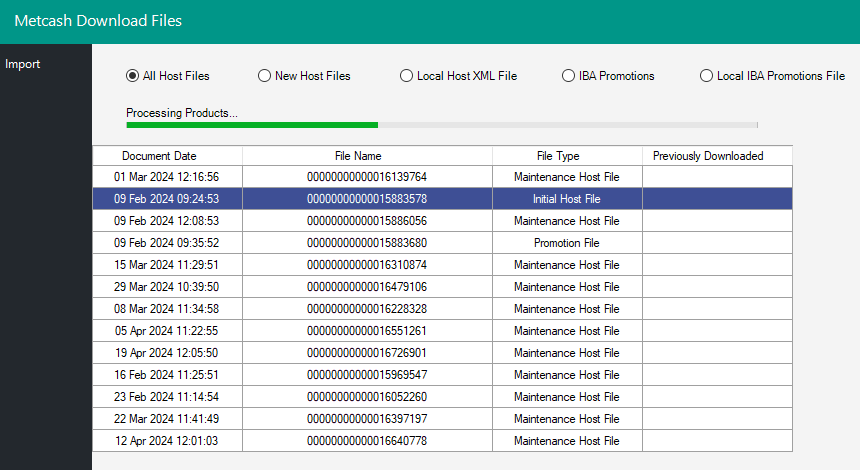
When the Host File is being downloaded, a progress bar will appear to indicate the progress of the Host File download.
It will also show a message to indicate the data that is currently being processed.
The two screenshots below show that the message displayed with the progress bar will change, depending on the data that is currently being processed and imported.
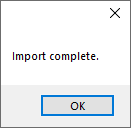
After the Initial Host File has been downloaded, an "Import complete" message will appear.
Press "OK" to close the message.
The Previously Downloaded column will then show the date and time when the Initial Host File was downloaded.
Close the Metcash Download Files window to continue with the next step below.
The Product Linking step below contains an option to "Create Links using Default Mapping from Departments".
To enable the linking of items using Default Mapping from Departments, it is recommended that Idealpos Departments are mapped to Metcash Departments, Categories, Commodities and Sub-Commodities.
Mapping of Idealpos Departments to Metcash mapping is also essential for Metcash Scan Data, therefore this step must be done.
Also note that when any Idealpos Department is created or modified, it can only be created/saved once the Metcash mapping has been populated for that Department.
This step will take some time as it involves a large amount of manual data entry for every Idealpos Department that exists in the database.
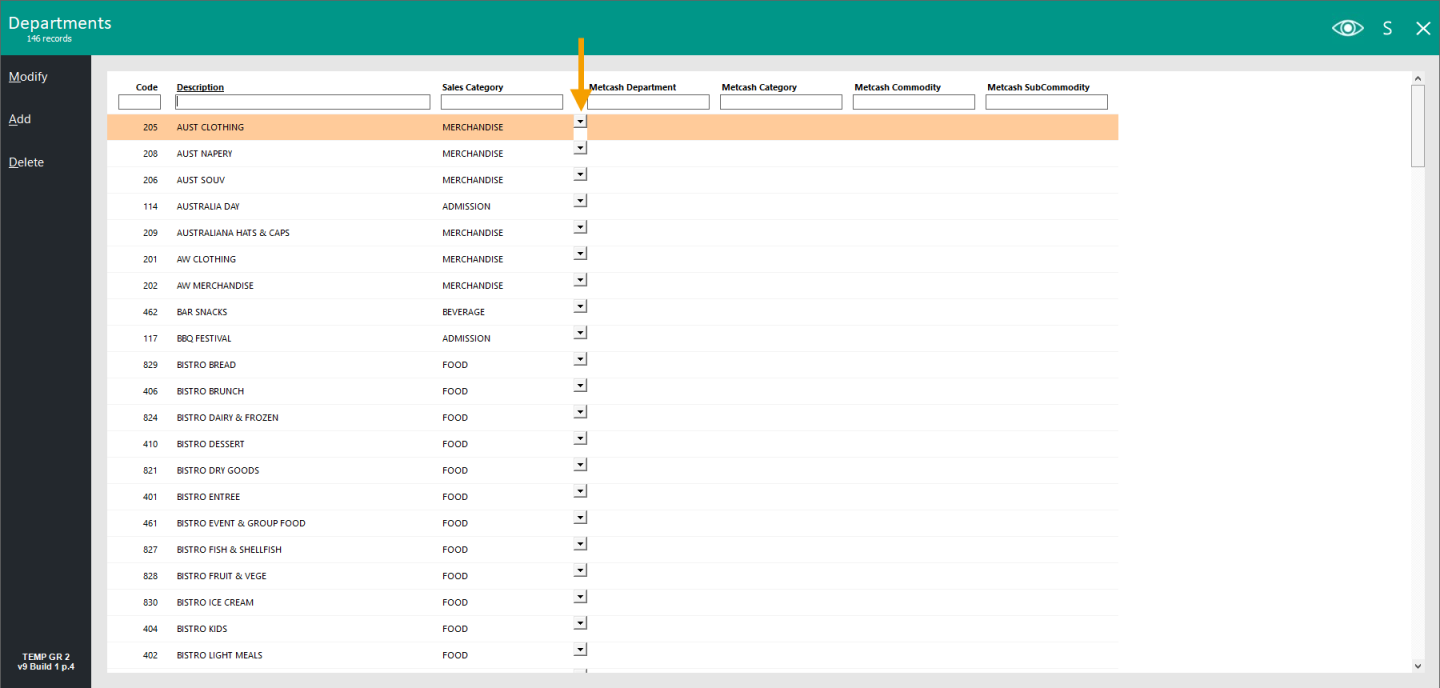
To complete the mapping process, go to: Back Office > File > Sales > Departments.
Click on the first Department's Sales Category drop-down box.
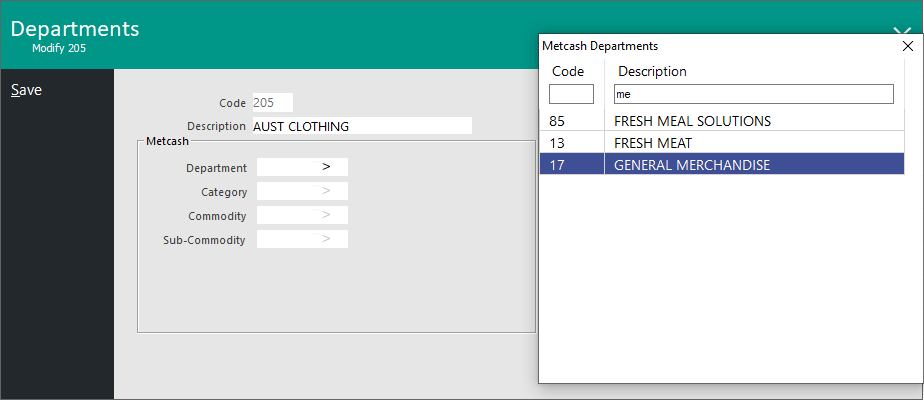
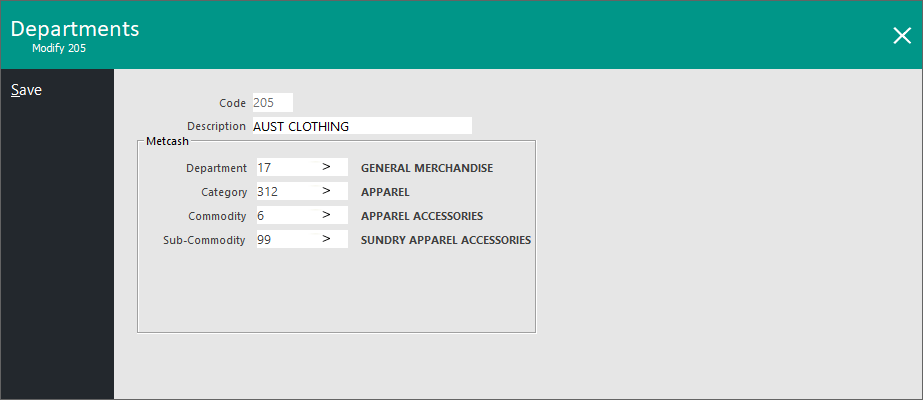
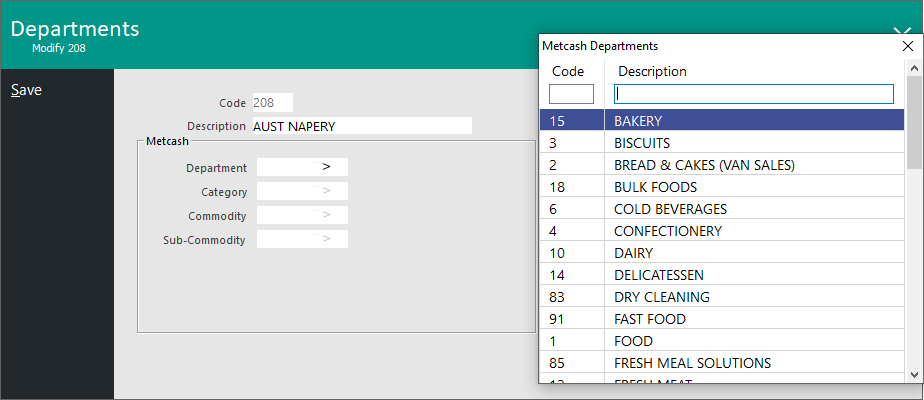
The Department's Metcash Department, Category, Commodity and Sub-Commodity will need to be mapped.
The window that appears will display a list of Metcash Departments.
A Department can be searched by entering the Metcash Department Description into the Description search field.
As the Department is entered, the Department list will be filtered by Departments that match the entered Description.
The arrow keys can also be used on the keyboard to highlight a Department from the list.
Once the correct Department is selected/highlighted, the keyboard enter button can be pressed to input that Department into the Department field.
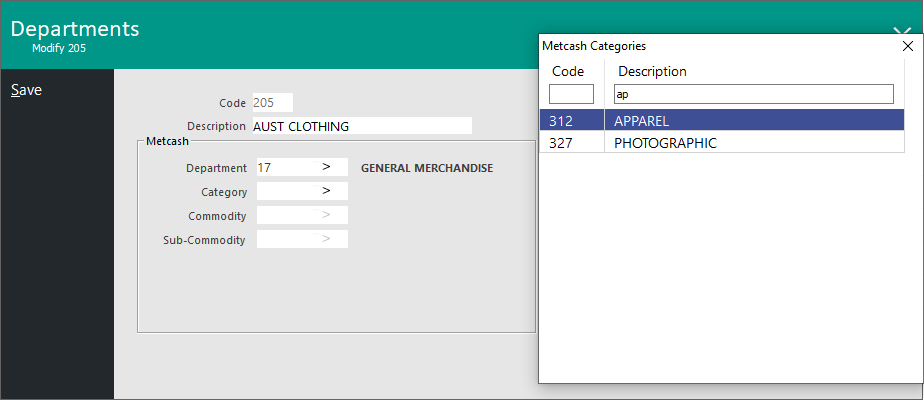
After the enter button is pressed, the Metcash Categories window will be displayed.
Use the same method to search for a Metcash Category by entering the Category Description and use the keyboard arrows to select the required Category and press the keyboard enter button to input that Category into the Category field.
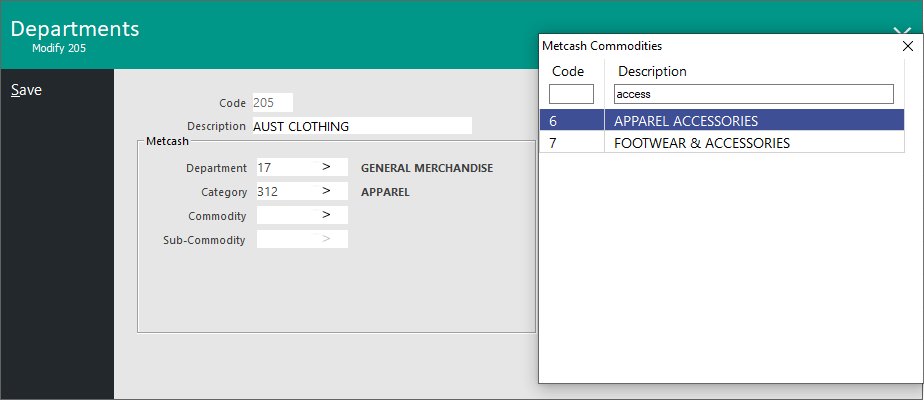
After the enter button is pressed, the Metcash Commodities window will be displayed.
Use the same method to search for a Metcash Commodity by entering the Commodity Description and use the keyboard arrows to select the required Commodity and press the keyboard enter button to input that Commodity into the Commodity field.
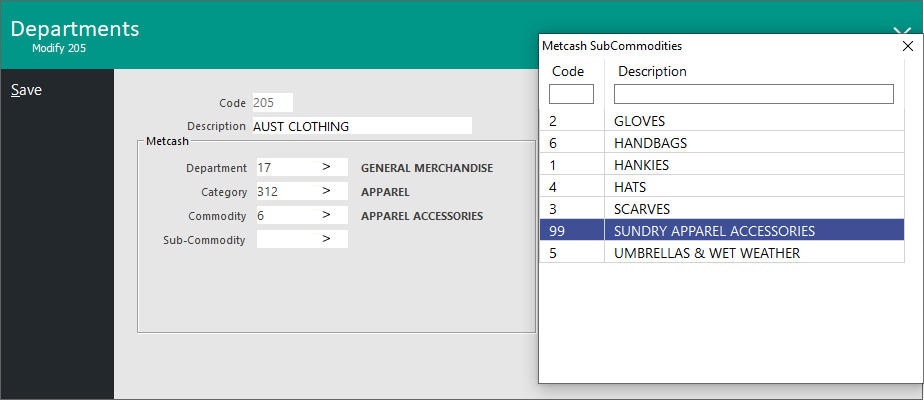
After the enter button is pressed, the Metcash Sub-Commodiites window will be displayed.
Use the same method to search for a Metcash Sub-Commodity by entering the Sub-Commodity Description and use the keyboard arrows to select the required Sub-Commodity and press the keyboard enter button to input that Sub-Commodity into the Sub-Commodity field.
After the enter button is pressed, the Metcash Mapping window will show all the mappings that have been entered for the Idealpos Department.
Pressing the ENTER button on the keyboard will save the entered mappings for the Department and will close that Department's window.
Idealpos will return to the Departments window where the Metcash Department, Category, Commodity and SubCommodity mappings will now be visible for the Department that was just mapped.
The arrow keys on the keyboard can be used to go down to the next Department and press the "ENTER" button to modify the next Department in the list.
After pressing ENTER, the above process can be repeated to map the Department to the Metcash Department, Category, Commodity and Sub-Commodity.
Repeat the above process until all Idealpos Departments have been mapped to a Metcash Department, Category, Commodity and Sub-Commodity.
To link Idealpos Stock Items to Metcash Products, go to: Back Office > Utilities > Metcash > Product Linking.
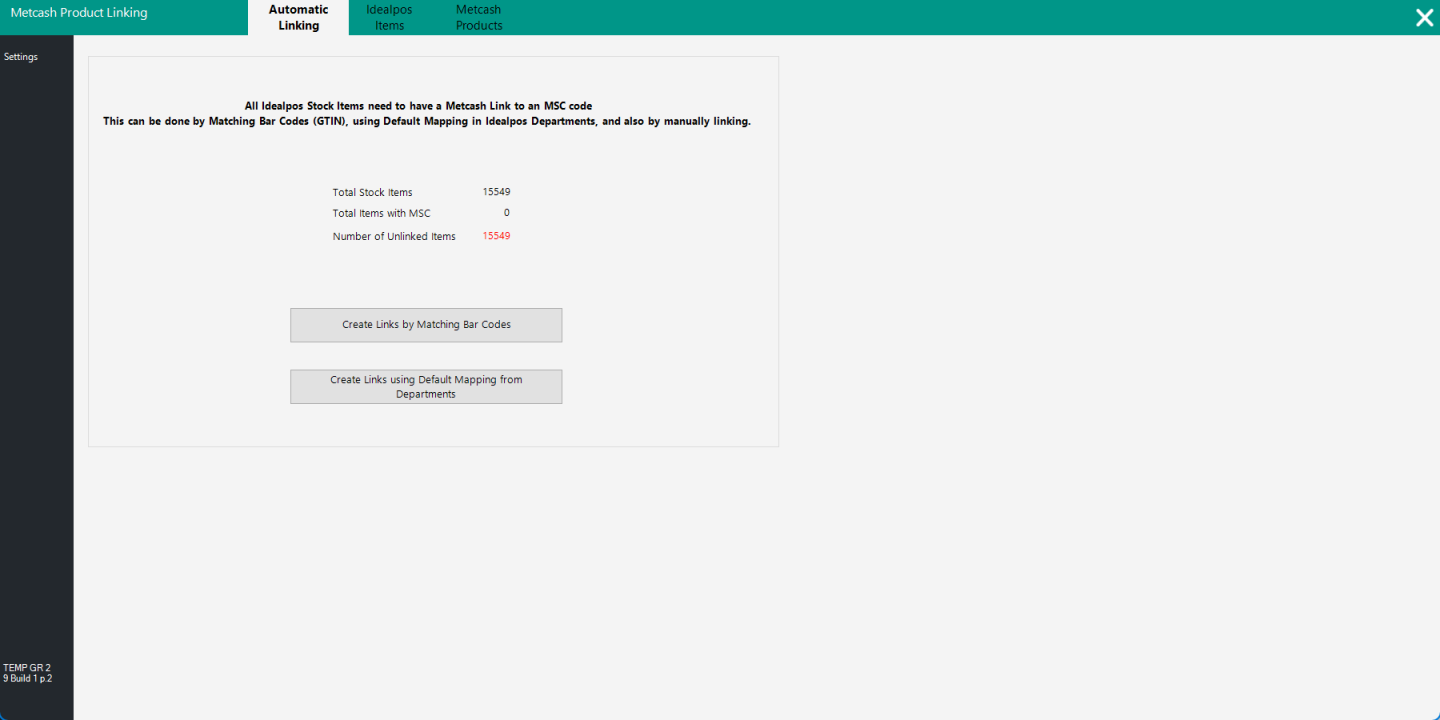
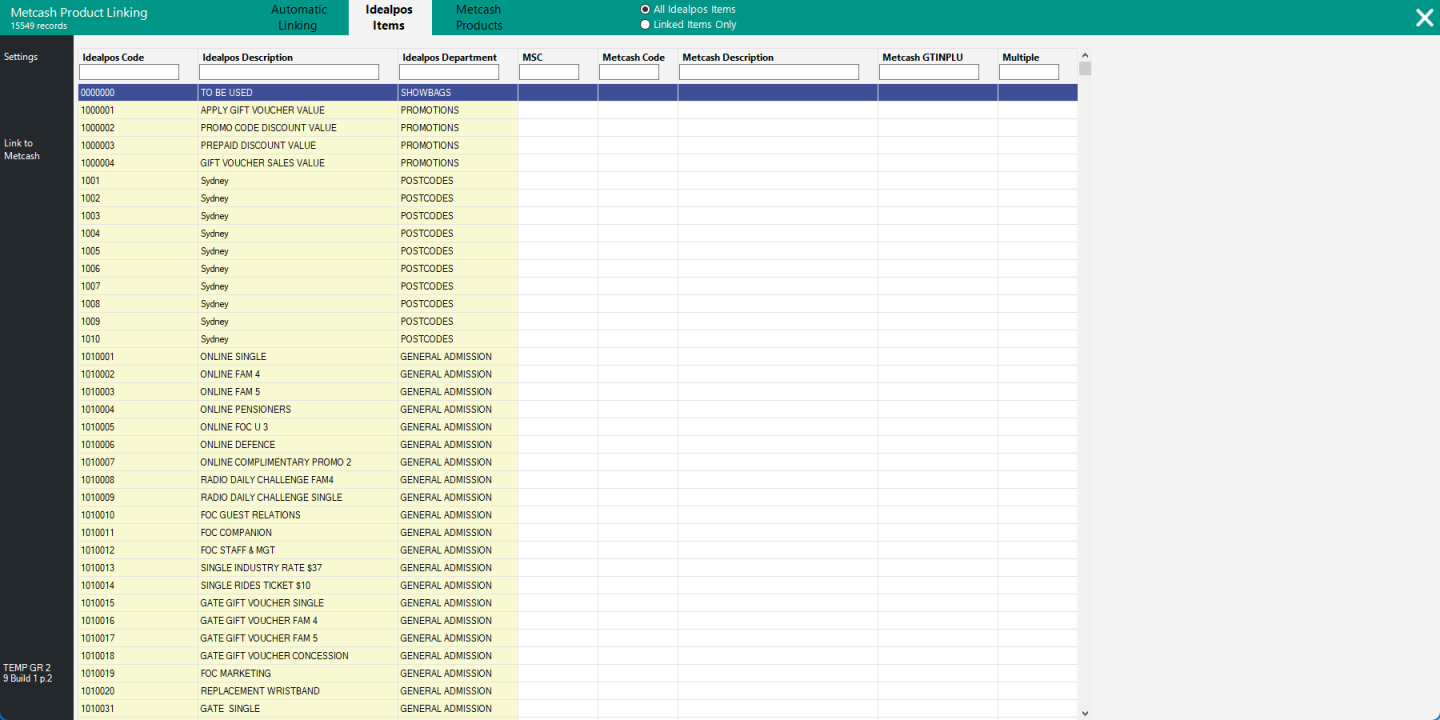
The Metcash Product Linking window will be displayed which consists of the following tabs/options:
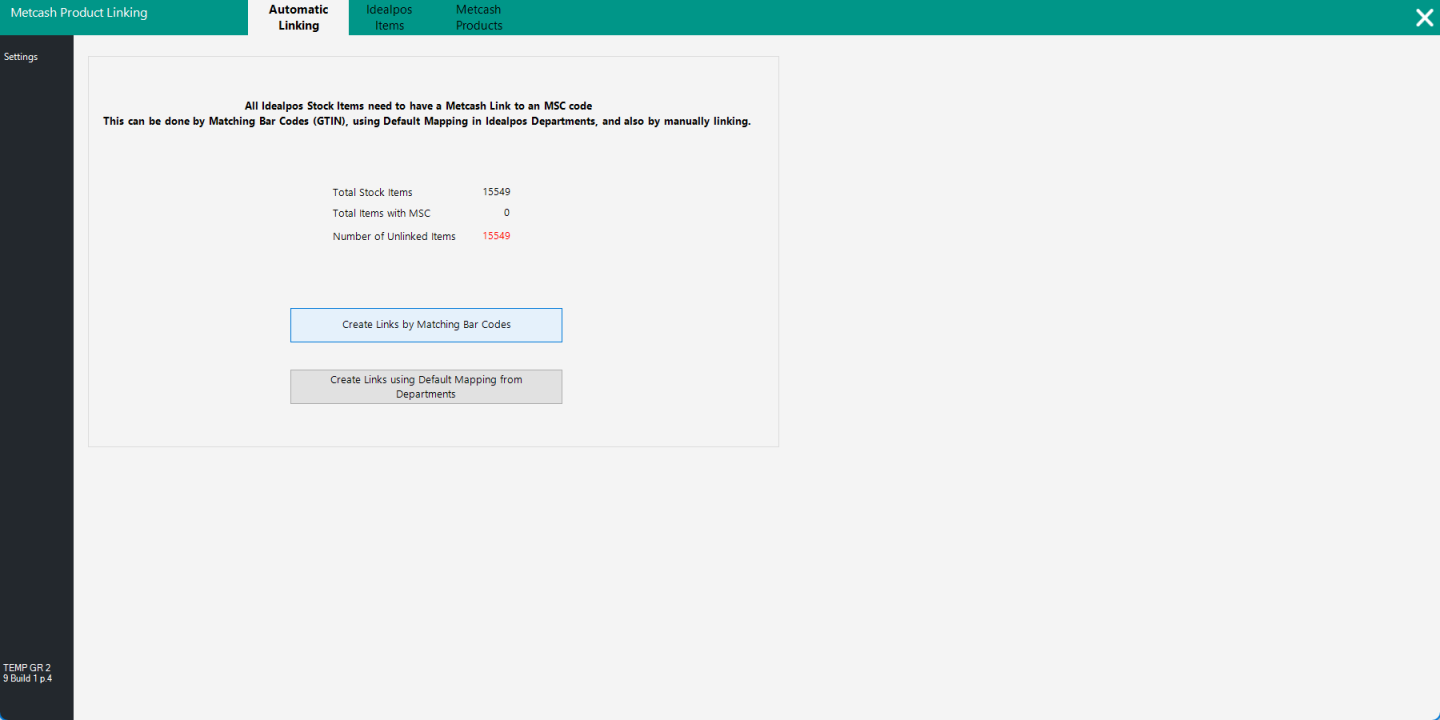
Automatic Linking tab:
Idealpos Items tab:
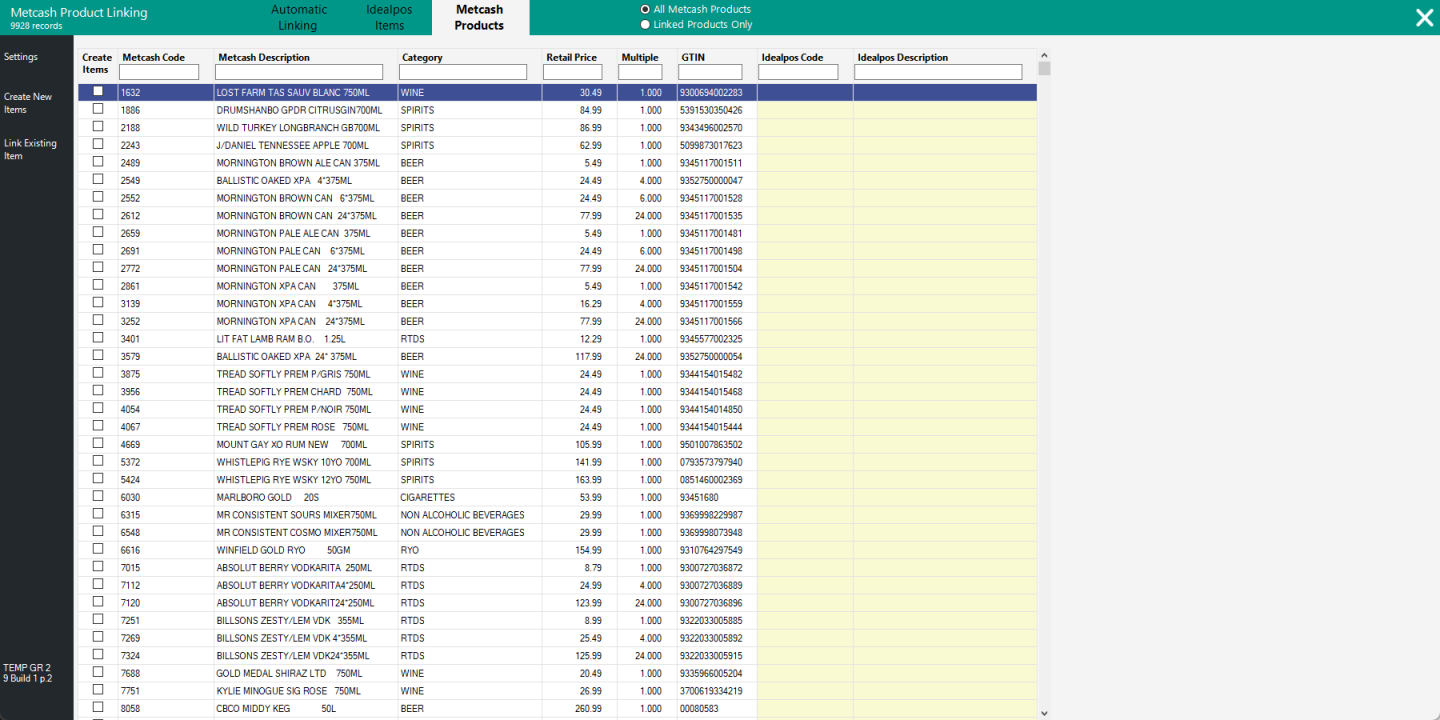
Metcash Products tab:
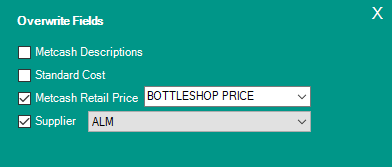
Settings:
The following examples outline the process to:
Create Links by Matching Bar Codes
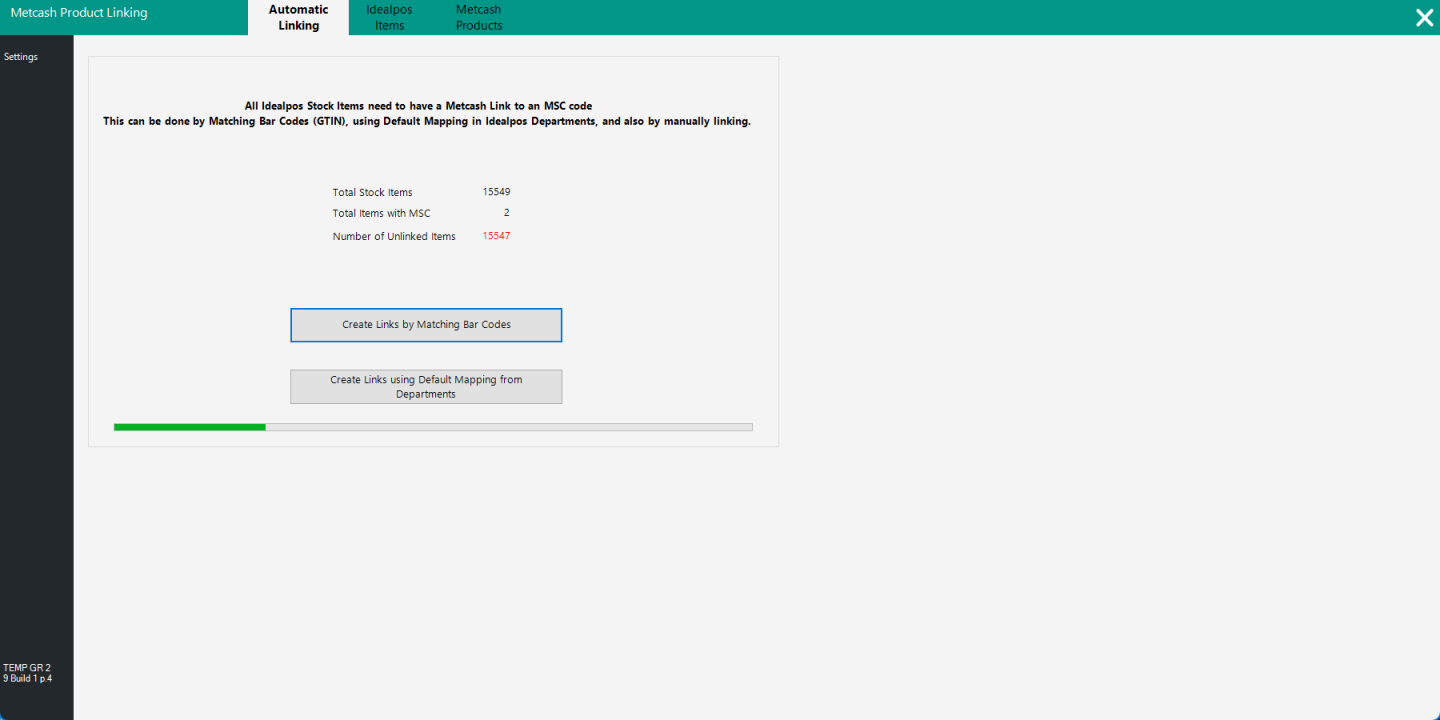
Simply press the "Create Links by Matching Bar Codes" button within the Automatic Linking tab.
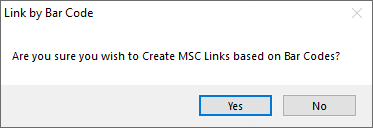
A confirmation prompt will be displayed.
Press "Yes" to continue with the linking process.
Idealpos will create the links and while this is taking place, a progress bar will be displayed.
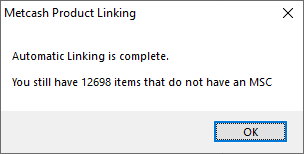
After the links have been created, a prompt will be displayed to indicate that the Automatic Linking process is complete.
The prompt will display the number of items that do not have an MSC.
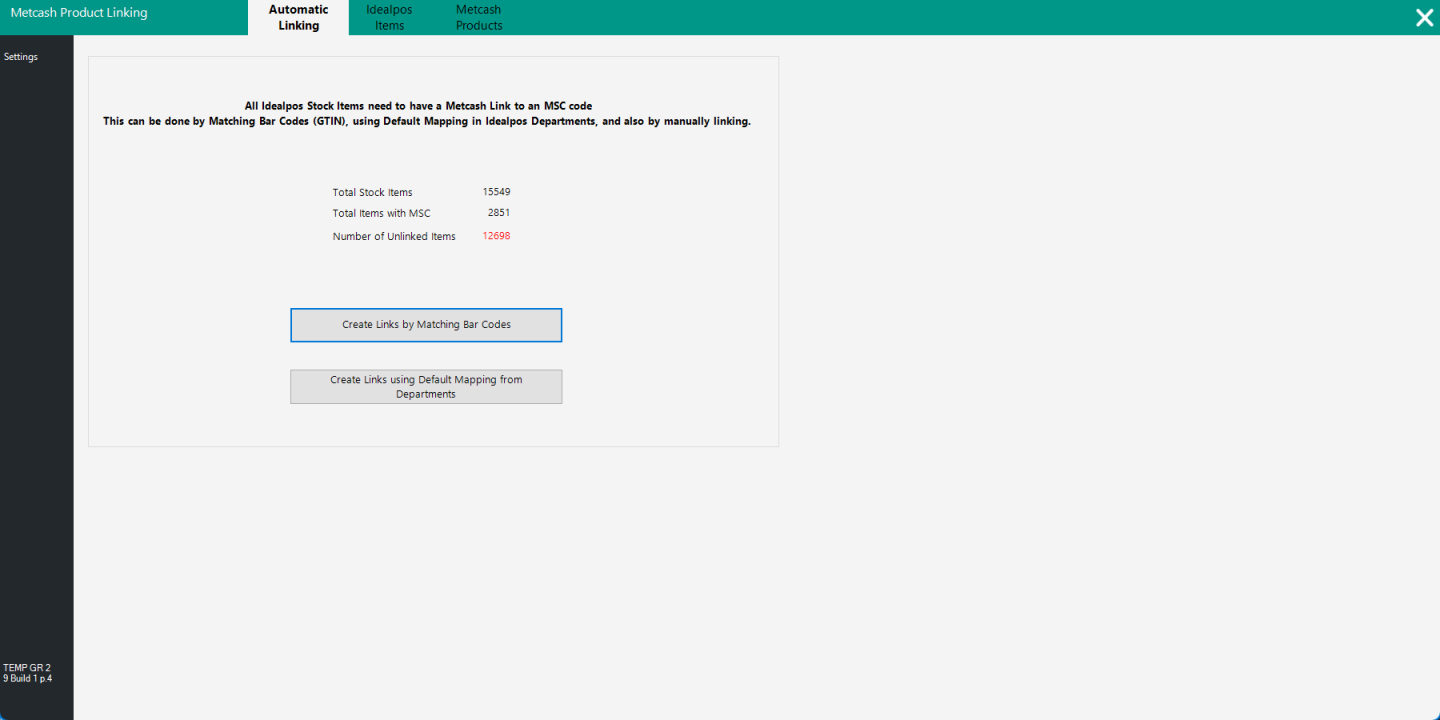
The Automatic Linking tab will show the current status of the Stock Items/MSC Links - The Total Items with MSC will increase, and the Number of Unlinked Items will decrease.
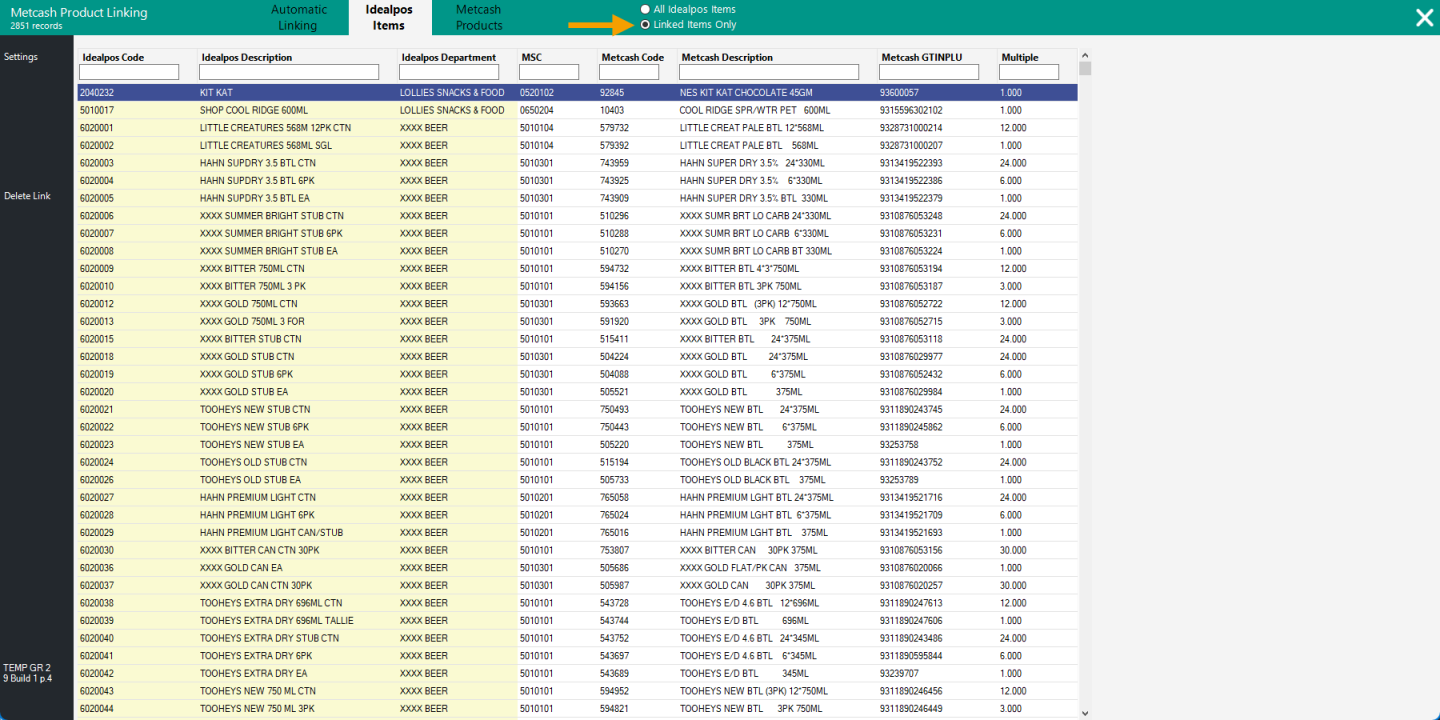
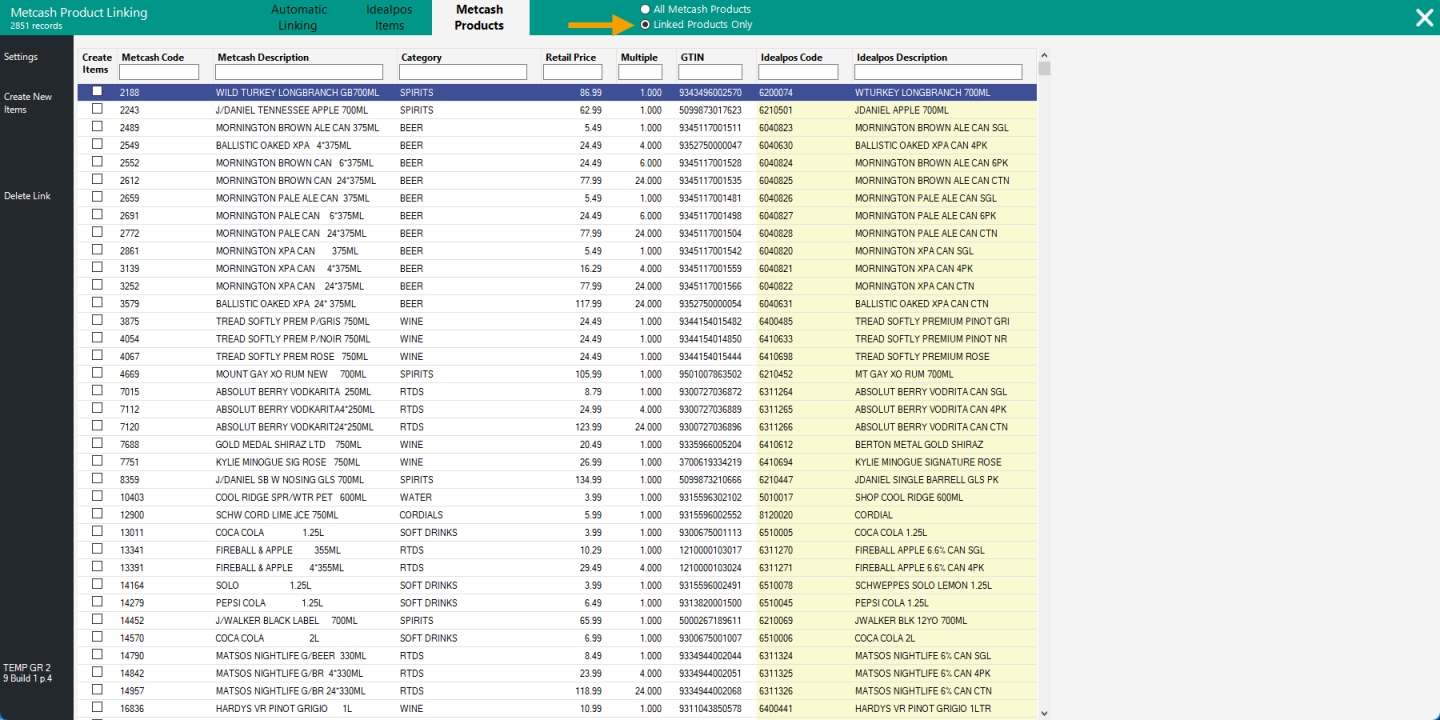
The Idealpos Items and Metcash Products tabs will show items that have been linked (the list can be filtered by clicking on the "Linked Items Only" in the Idealpos Items tab or "Linked Products Only" in the Metcash Products tab).
Create Links via the Idealpos Items tab
Press the Idealpos Items tab, search and select an Idealpos Stock Item in the list and press the "Link to Metcash" button on the top-left corner.
A new window will be displayed and will automatically pre-fill the Metcash Description field with the Idealpos Stock Item's Description so that only Metcash Products that have a similar description will be displayed in the list of items.
Select the matching item in the list and press the "Save Link" button on the left-hand side.
After saving the link, the Idealpos Stock Item will show the Metcash Product that it has been linked to.
Create Links via the Metcash Products tab
Press the Metcash Products tab, search and select a Metcash Product in the list and press the "Link Existing Item" button on the top-left corner.
A new window will be displayed and will automatically pre-fill the Idealpos Description field with the Metcash Product's Description so that only Idealpos Stock Items that have a similar description will be displayed in the list of items.
Select the matching item in the list and press the "Save Link" button on the left-hand side.
After saving the link, the Metcash Product will show the Idealpos Stock Item that it has been linked to.
Create New Items via the Metcash Products tab
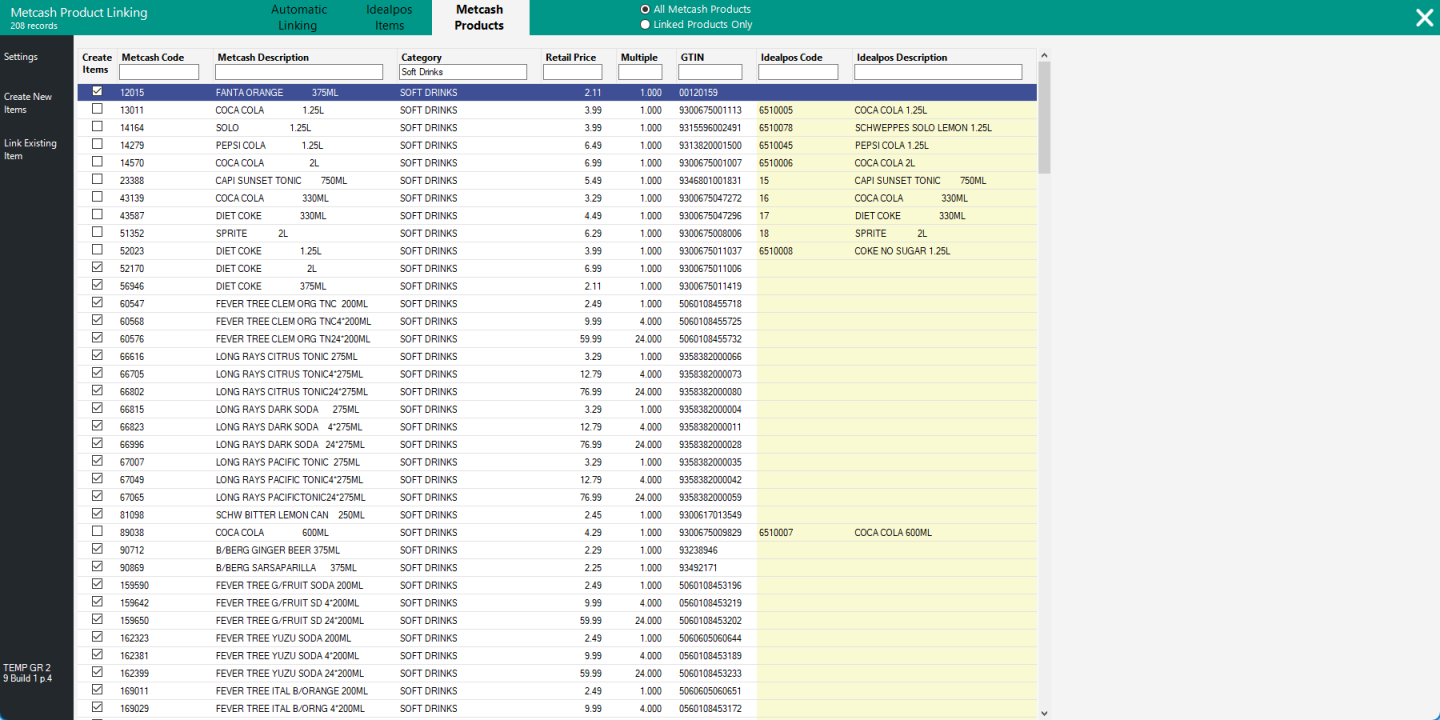
Press the Metcash Products tab and enable the checkbox in the "Create Items" column for each Product that needs to be created.
Once the required items have a checkbox enabled in the "Create Items" column, press the "Create New Items" button on the top-left corner of the window.
Note!
The "Create Items" checkbox cannot be enabled on Metcash Products that have already been linked with Idealpos Stock Items.
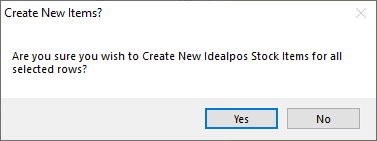
A confirmation prompt is displayed - Press "Yes" to Create New Stock Items for all the selected rows that have the "Create Items" checkbox enabled.
The Items are created and will show an Idealpos Code and Idealpos Description after they've been created.
Tip!
The "Create Items" column header can be pressed and this will enable the Create Items checkbox for all items that are currently visible in the filter so that those items can be created.
The "Create Items" checkbox on Metcash Products that are already linked to Idealpos Stock Items will remain unchecked.
The example below shows that all Metcash Products that are already linked to Idealpos Stock Items will have their "Create Items" checkboxes unticked when clicking on the "Create Items" column header.
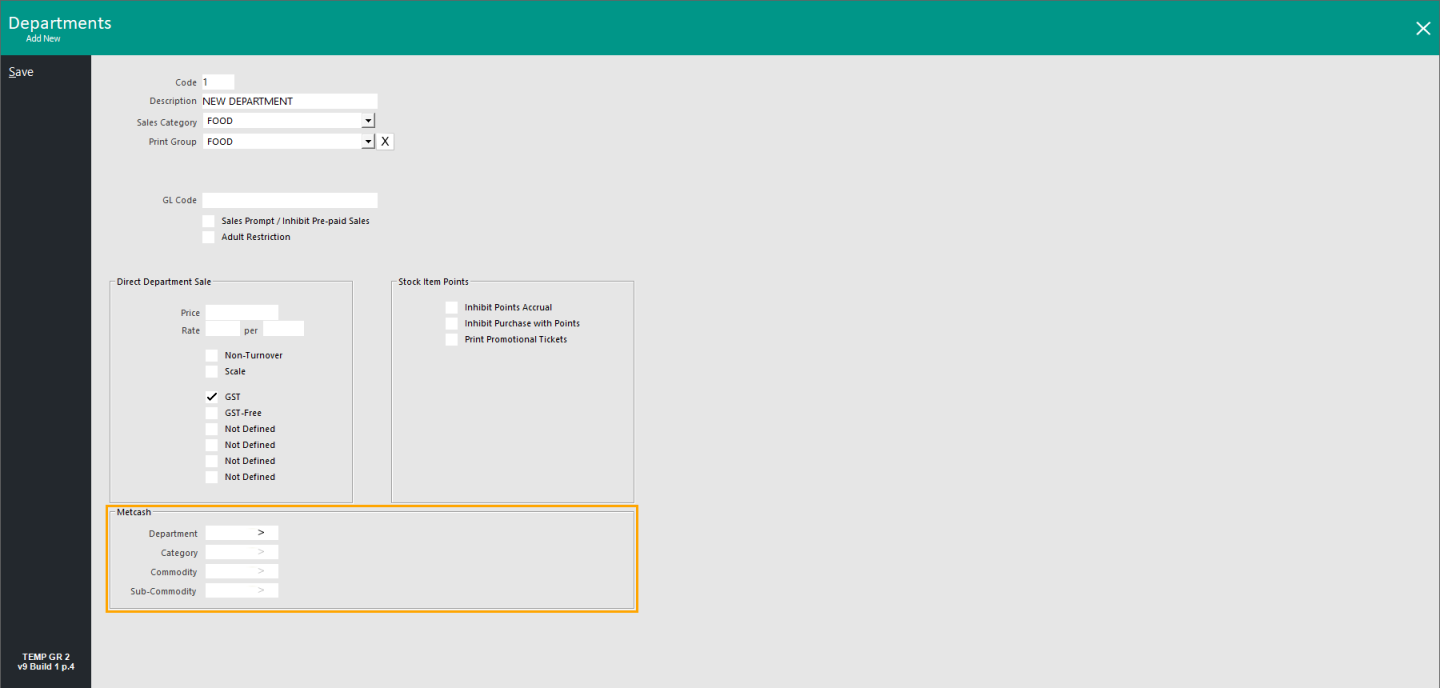
When a new Department is created (Back Office > File > Sales > Departments), it must have the Metcash Mapping fields populated.
When an existing Department is modified, it must also have the Metcash Mapping fields populated.
Failing to populate the Metcash Mapping for an Idealpos Department will result in the following prompt being displayed.
The above prompt will prevent the new Department from being created, or in the case of modifying an existing Department, any changes to that Department will not be saved.
Once the required Metcash Mapping has been populated for the Department, the Department can then be saved successfully via the Save button.
Mapping is entered at the bottom of the Create/Modify Department window as shown below (press the ">" button within each of the fields in the Metcash section to map to the relevant Metcash Department, Category, Commodity and Sub-Commodity).
When creating or modifying a Stock Item in Idealpos, the Stock Item can only be saved once the item is linked to Metcash Mapping (Department, Category, Commodity and Sub-Commodity).
Provided that the Idealpos Stock Item is linked to an Idealpos Department that has had its Metcash mapping information populated, the Stock Item will automatically inherit that Department's Metcash mapping information.
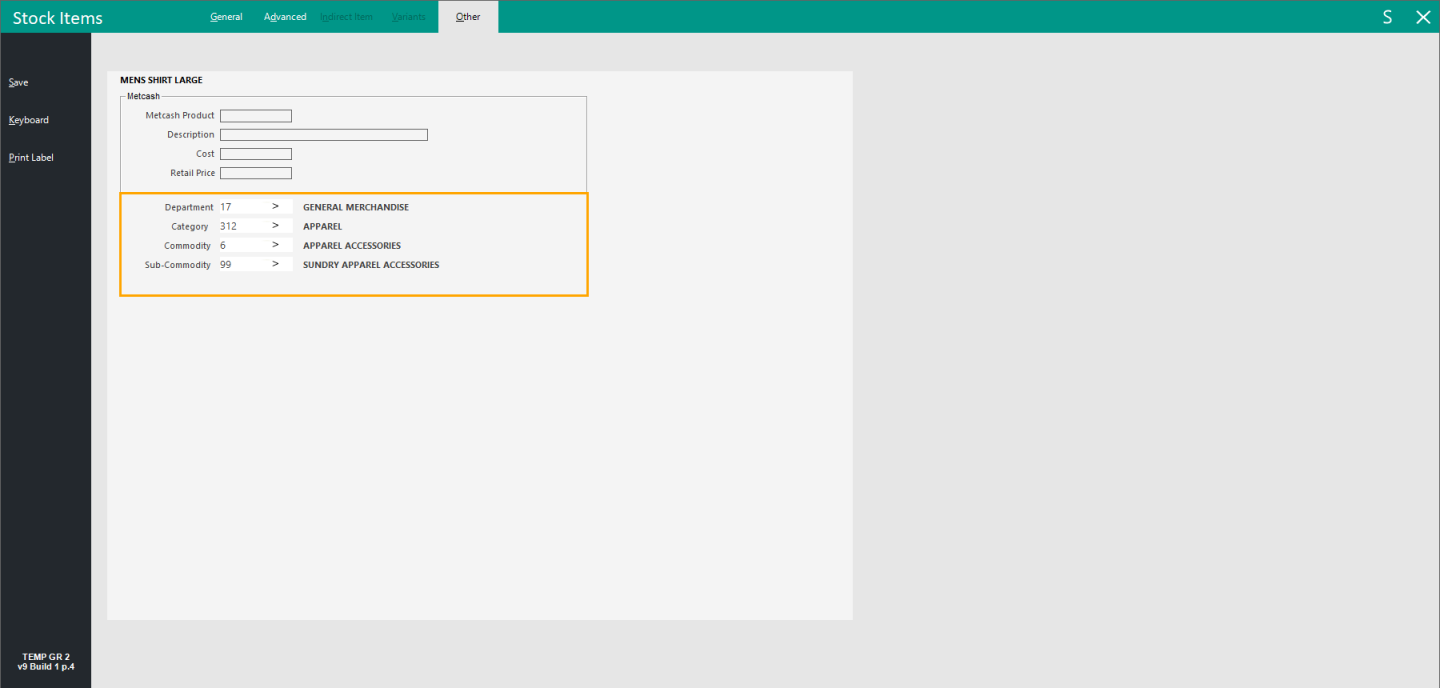
If required, the Metcash mapping information can be changed for the Stock Item via the "Other" tab, which will contain the Metcash mapping.
Go to: Back Office > File > Stock Control > Stock Items > Create/Modify a Stock Item.
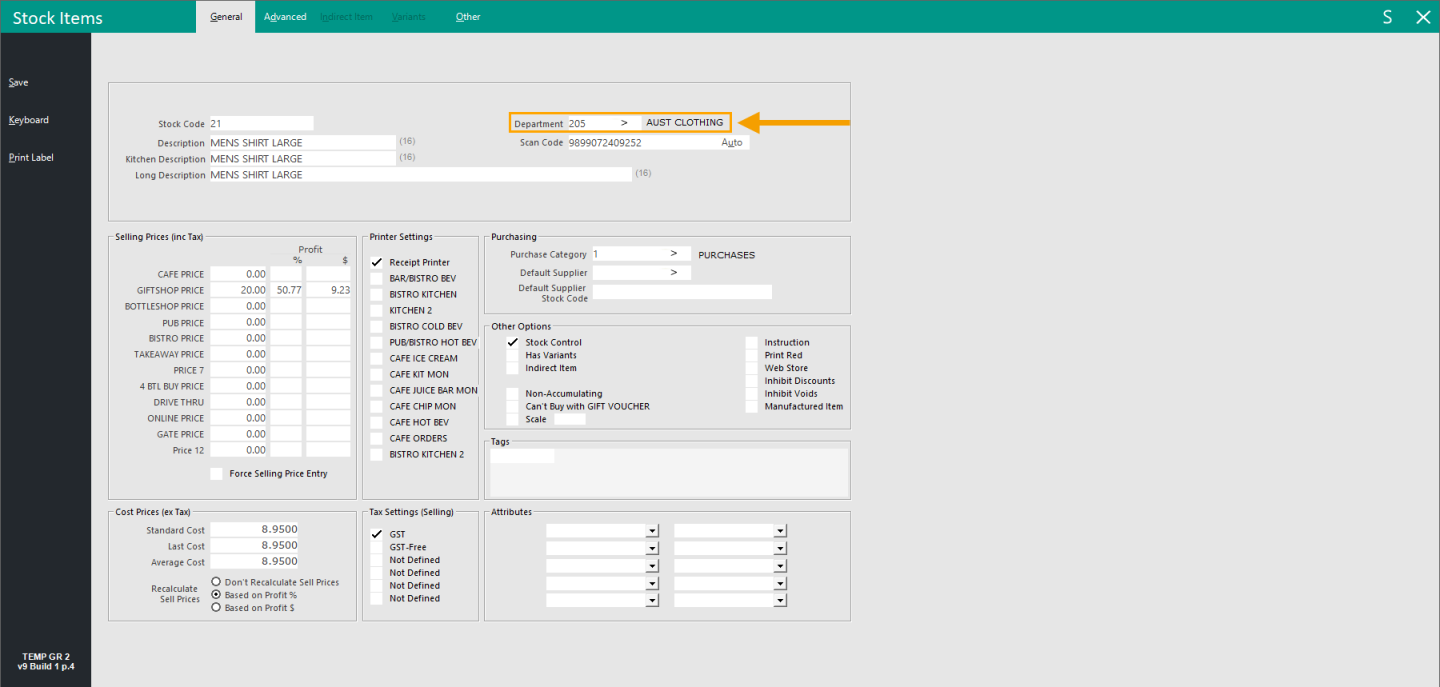
Select a Department that has had its Metcash mapping populated.
When clicking on the Other tab, the Metcash mapping information will be displayed (which is inherited from the Department that was selected in the General tab).
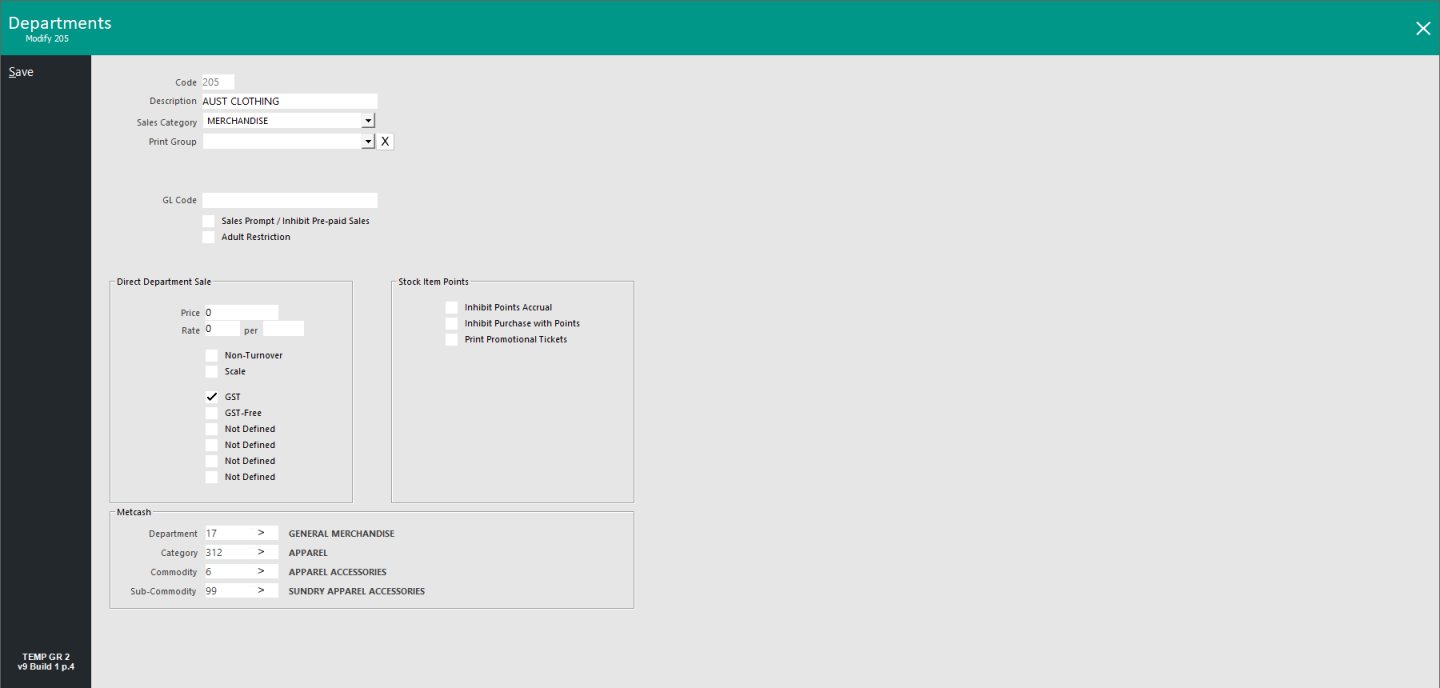
The Department that the Stock Item has inherited the Metcash mapping from is shown below.
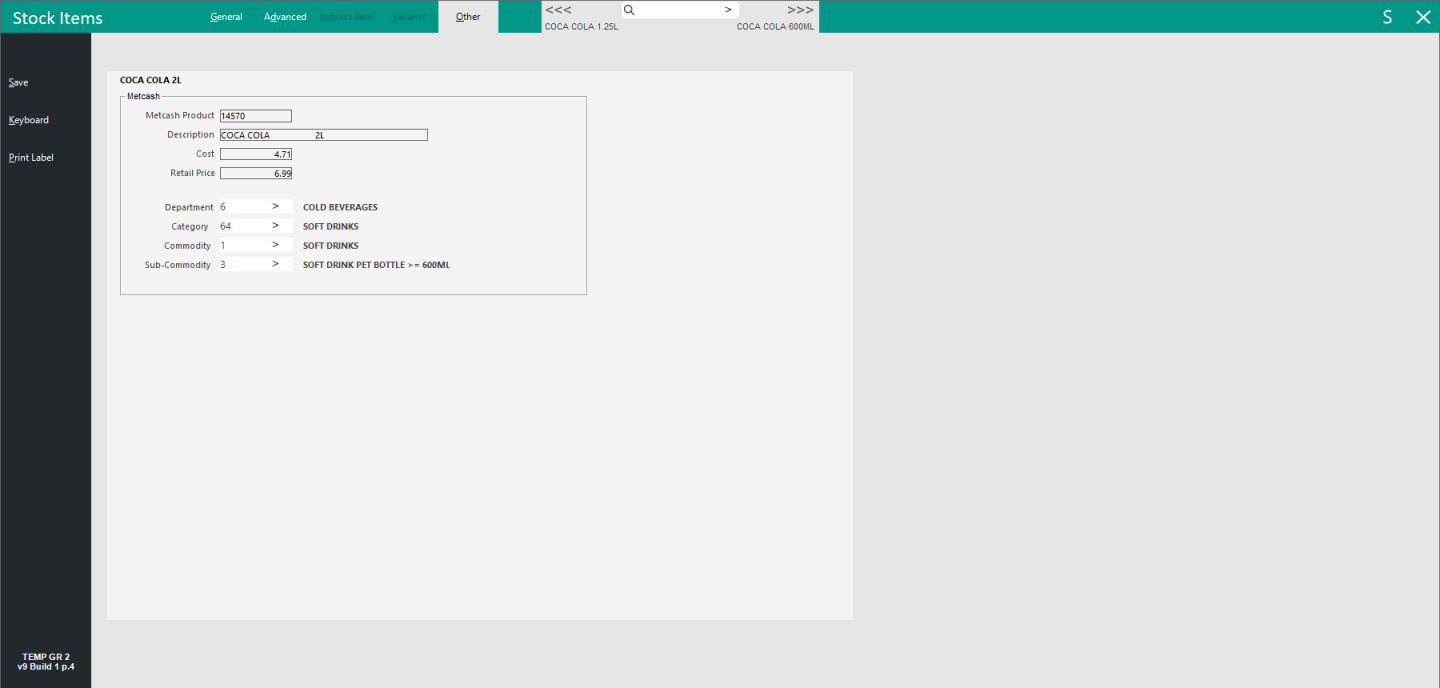
If a Stock Item that has been linked to a Metcash Product is modified (via Back Office > Utilities > Metcash > Product Linking), the Other tab will show the Metcash Product that the Stock Item is linked to along with the Metcash Description, Cost and Retail Price.
It will also show the Metcash Department, Category, Commodity and Sub-Commodity which are sourced from the Metcash data rather than from the Metcash mapping configured in the Idealpos Department.